Combined Instructions/Fill Material

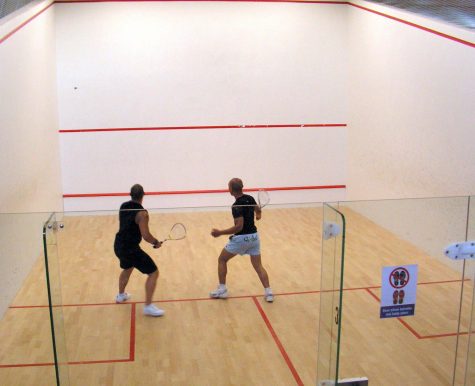
Caption.
September 29, 2016
Avoid Double Placement: If you place stories in more than one category, say both Showcase and Sports, the story will display in both of these sections on the homepage. The recommend way of working with this is to place a story in the Showcase category first, and then once other stories have displaced it as a top story, change the story to be in Sports category. This way the story will be filed correctly, but it will not display twice.
Also when placing stories in a subcategory, you do not need to also place them in the parent category.
Showcase:
This area at the top of the homepage is called the Home Top Story & Showcase Area. You can use this space to showcase your top stories.
You have two options for this area: displaying a single Top Story or showcasing many stories/photos most recently added to single category. There are many options for showing multiple stories. Some options include just images, others use images with text. Some will spread across the entire width of the homepage, and others will provide space for a sidebar. The SNO Design Options page will let you choose which look works best for your site.
This carousel can be kept fresh by using the Showcase category and labeling all stories you wan to scroll through this Showcase Area with that category. There is a section on the SNO Design Options page that allows you to control the settings for this Home Showcase Carousel.
Customize the Look and Feel:
The look and feel of this site is created by a combination of style and layout choices. To help get you started, your site came with a preselected style, but you can change this preset style to create a different baseline look.
You can change the fonts, background, general appearance, and even your site’s favicon and bullet points by using the tools provided under General Design and Layout.
Each widget on your site can be assigned to one of five widget styles that you can customize. In addition, SNO widgets can each be assigned custom colors and styles in the controls for the individual widget on the Edit Widget page.
Featured Image: There are two ways to add a photo to a story in WordPress. One is to set the photo as a Featured Image for the story, and the other is to insert the photo into the body of the story’s text. Your SNO site is designed to make use of the Featured Image method. Photos inserted directly into the body of the story will not show up on the homepage, the category view page, or the search page.
Make sure your photo is properly sized before uploading it to your site. Then add any new story and scroll to the bottom of the Edit Story page and find the set Featured Image box on the right-hand side; click on the set featured image link.
Click on Upload Files in the upper left-hand corner, then click select files or drag and drop the picture you would like to be the featured image for this story. The picture will upload and a set of fields/boxes will appear to the right. Fill in the Caption and Photographer boxes.
Click the set featured image button in the lower right-hand corner and your featured image show up in the featured image box. Choose the location for your Feature Image from the dropdown menu in Custom Fields.
Feel of Publication: The SNO Framework is built around the idea of giving site owners complete flexibility with easy to customize options for every aspect of their sites.
The SNO Design Options page, available under the Appearance tab on the left side of your WordPress dashboard, allows you to change to a different preset style starter, change locations of many of the elements such as navigation bars and social media icons, and change all the site’s colors, fonts, and styles.
On the SNO Design Options page, you can also choose how you want to layout your home, story, category, and staff pages. Clicking under the About Home Page Structure section of the SNO Design Page allows you to see which elements widget areas of the layout are active on your homepage. Clicking on the Story Page section lets you choose a story page that includes a side bar, one that reveals a full page story option, or one that use immersive photos and chapters. Clicking on the Category Pages section and the Staff Page lets you choose which style you’d like for each page.
With the exception of the Showcase Box and Teaser Bars, the content of your site is placed in widgets that can be dragged and dropped into any area. Your site has five widget styles that you can define on the SNO Design Options page. In addition, each SNO widget can be set to its own widget style and further given a custom color scheme.
Every color on your site can easily be changed with our simple color picking tools. These are available on the SNO Design Options page as well as in every SNO widget.
When your site was built, it had a default text header with your publication’s name and tagline. On your SNO Design Options page, there’s a place to upload a custom header graphic to give your site its own identity.
The three navigation menus (two at the top and one in the footer) on your site can edited by clicking Menu under the Appearance tab. You can have unlimited levels of drop-downs on your site’s top navigation bars.
Beyond Text: Stories don’t have to be for just the written word any more. Using some of the SNO FLEX features you can add embeddable objects, pull quotes, related story links, and videos all right along side the story text. Check it out on the SNO help site: http://v5.help.snosites.com/add-content/story-features/
Social Media: Social media platforms are the best way to drive traffic to your new site.
So, set up a Facebook Fan Page, and get your audience to like your publication. Even add a Facebook Like Box to your website to increase your audience. Then when you publish a story, add a link and teaser on your Facebook Fan Page.
For Twitter, set up an account for your publication, and get your audience to follow your publication. Then use your tweets to provide your audience with instant news and sports updates. You can even display your Twitter feed on your website. And when you publish a story, tweet about and link to the story from your Twitter account.
For Instagram, set up an account for your publication, get your audience to follow your publication. Use Instagram to provide visual images of news and happenings that would interest your audience. Don’t forget to link your Instagram account to your website.
Custom Header: Your header graphic should have your logo, organization name, tagline, and any other essential information about your program. Your graphic should be sized to 980px wide, and the height should be between 100px and 200px. You can upload your header graphic in the Custom Header Graphic section of the SNO Design Options page.
Adding Video:
You need to use a third-party video hosting service to store and serve video. These services are built specifically for serving high quality video, and their accounts are free. Start by creating an account and uploading video to a video-hosting site. After you have uploaded your video clip to an online video service, locate and copy the embed code for the service’s video player. Each provider will have code that looks slightly different.
Next you can add your video as a standalone story. Click on New under the Stories tab on the left navigation bar in the WordPress dashboard. Then enter the Title for the article. If you have a story or short explanation of your video, paste that in the main text-editing window, but do not add your video in this window.
Paste your video embed code in the custom field labeled Video Embed Code below the main text-editing window. If you want to give credit for the video, add a name in the Video Credit Line Custom Field box. If there is a staff profile for this name, this video will automatically be linked to that staff profile.
More information on how to complete this process can be found here: http://v5.help.snosites.com/add-content/videos/
staff: The WordPress publishing system allows for multiple user accounts and administrative privileges. Your setup already includes a user account for the adviser. You can add as many users as you want to your site giving each one a unique role.
Users who are Administrators have access to all the administration features, including comment moderation, theme options, widgets, galleries, and polls.
Those users who are set up as Editors can publish articles, manage articles as well as manage other people’s articles, etc.
Authors can can publish and manage their own articles. Contributors, on the other hand, can write and manage their articles but not publish articles. And a Subscriber can read comments/comment/receive news letters, etc.
To add user accounts, click Add New under the Users tab on the left navigation bar in the WordPress dashboard, complete the new user fields, and click the Add User button.
Google Analytics: Once you start producing content, you’re going to want to know who’s reading it. Your site is setup with Google Analytics, a robust reporting tool from Google. Each week you’ll receive an e-mail report of your previous week’s site statistics. You can review the report with your staff to learn how viewers are finding and using your new site.
If you would like to be able to log in to your Google Analytics account to get a comprehensive view of your site stats, submit a support request and provide us with a gmail address, and we’ll add you to the account.
Sport Scores: Your site includes a scrolling sports score box widget that can be set to display in any of your widget areas. To adding a sports score, click on New under Sports Score on the left navigation bar in the WordPress dashboard. Enter placeholder text in the title box. This title will not be displayed on the site, but it is necessary to ensure that your score is saved properly in the database. Then Fill out the fields for Date, Score, Opponent’s Score, Opponent, and Sport. If the sport result is a “placement” rather than a score, simply type the placement in the Score box and leave the Opponent’s Score box blank. Click Publish
If you’ve purchased the SNO Sports Center package, you’ll also have these widgets: SNO Sports Schedule Widget and SNO Sports Standings Widget.
Image Size: Size your horizontal photos to 900px wide by 600px tall at a resolution of 72 dpi in RGB color mode before uploading them to your site. Always save photos in .jpg format. Your site will display vertical photos fine (except in the Showcase box), but the formatting of the text around them won’t be as clean. Vertical photos should always be sized to 600px wide. The size of the photos in the Showcase area will vary based on which style of Showcase box you have selected; your site will automatically crop photos to fit the Showcase area, if you upload a photo of the wrong dimension.
Image Stuff: our site automatically generates a series of scaled down images for each photo you upload for the various parts of your site that display different sizes of images.
Cameras take pictures at a far higher resolution than will ever be useful on a website — the pictures you take are often more than 100 times larger than your website needs. In order to keep your website from loading slowly, it is important that you scale your photos down appropriately before you upload them to your site.
You can use PhotoShop’s cropping tools and Save for Web option to effectively reduce the file size of a photo before you upload it to your site.
Always save your photos in RGB color mode — this is the default mode your camera uses. Color photos for print require CMYK mode, but CMYK mode doesn’t work consistently on all browsers.
Full Story:Want to tell the full story? To get started click on New under the Stories tab on the left navigation bar in the WordPress dashboard.
Enter the headline for the article. In the box to the right of the title, choose your title size for the Story Page, if you would like it to be different from the default option. If you would like a secondary headline or deck for the story, type it into the appropriate box in the right-hand column.
Either type or paste the main body of the story in the main box on the page.
Every story has three options for its story page: Full-Width, With Sidebar, or Long-Form. Simply, select which you would like. The default for this option can be set on the SNO Design Options page under the options for Story Page and Comments. This story is currently using the Long-Form style.
Scroll down to the box with category choices in the right column and select the appropriate category. The Showcase category is best used for the top area or showcase carousel on the homepage. You may assign a story to multiple categories, but this will cause it to show up in multiple places on your homepage.
Scroll to the bottom of the page and find the set Featured Image box on the right-hand side; click on the set featured image link.
Click on Upload Files in the upper left-hand corner, then click select files or drag and drop the picture you would like to be the featured image for the story. The picture will upload and a set of fields/boxes will appear to the right. Type your caption in the caption box and type the photographer’s name in the photographer box. If there is a staff profile for the photographer, this field is what will enable your site to automatically link this story to that staff profile.
Click the Set featured image button in the lower right-hand corner. You will now see your featured image show up in the featured image box.
Complete the Custom Fields as needed then scroll up and click Publish. The Publish button is in the right column about halfway down. If you return to edit this story, this button will have changed to the Update button. After making any changes to the story or its settings you will need to have click the Update button for them to take affect.
Sidebar: This story is currently using With Sidebar Page Template. Every story has three options for its story page: Full-Width, With Sidebar, or Long Form. Simply, select which you would like on the left hand side of the Edit Story page. The default for this option can be set on the SNO Design Options page under the options for Story Page and Comments.
You can design your sidebar by choosing which the widgets to display. Just go to Widget under Appearance on the Dashboard.
Custom Fields: Each story has custom fields available for you to fill in as needed. Not all of these features will show up on the homepage, but they will show up on a story’s page. While the descriptions for each custom field make its purpose obvious, read below for more information.
Writer: Be sure to add a writer for each story — this is what will connect the story to a writer’s profile on the staff page. You must spell the writer’s name exactly the same as when you set up the writer’s staff profile. Use the green plus to add another writer.
Job Title: You can add something like “Staff Writer” or “News Editor” in this box.
Featured Image Location: This choice determines where the photo is displayed on the story’s main page. It does not affect its placement on the homepage or other pages. Do not choose Slideshow of All Attached Images unless you have attached many images to the story.
Video Embed Code: Paste the embed code from any video on any site.
Video Credit: This will create a credit line just below the video on the story page — this will also connect the video to profiles on the staff page. Use the green plus to add more than one credit.
Video Location: This choice determines where the video is displayed on the story’s main page. It does not affect its placement on the homepage or other pages.
Audio: Once you’ve uploaded an .mp3 audio clip to your site, you can paste the URL of the uploaded clip here, and it will generate an audio player on the story page. You can also link to .mp3 files hosted anywhere on the Web; you don’t need to upload them to your site.
Sports Add-On: Attach to Sport Page: This only works if the Sports Center Add-On package has been installed on your site. This allows you to have a story show up on the individual pages in the Sports Center package.
Adding A story: Adding a story is a simple process with SNO FLEX. To get started, click on New under the Stories tab on the left navigation bar in the WordPress dashboard.
Enter the headline for the article. In the box to the right of the title, choose your title size for the Story Page, if you would like it to be different from the default option. If you would like a secondary headline or deck for the story, type it into the appropriate box in the right-hand column.
Either type or paste the main body of the story in the main box on the page.
Every story has three options for its story page: Full-Width, With Sidebar, or Long-Form. Simply, select which you would like. The default for this option can be set on the SNO Design Options page under the options for Story Page and Comments. This story is currently using the Full-Width.
Scroll down to the box with category choices in the right column and select the appropriate category. The Showcase category is best used for the top area or showcase carousel on the homepage. You may assign a story to multiple categories, but this will cause it to show up in multiple places on your homepage.
Scroll to the bottom of the page and find the set Featured Image box on the right-hand side; click on the Set featured image link.
Click on Upload Files in the upper left-hand corner, then click select files or drag and drop the picture you would like to be the featured image for this story. The picture will upload and a set of fields/boxes will appear to the right.
Type your caption in the caption box.
Type the photographer’s name in the photographer box. If there is a staff profile for the photographer, this field is what will enable your site to automatically link this story to that staff profile.
Click the set featured image button in the lower right-hand corner. You will now see your featured image show up in the featured image box.
Complete the Custom Fields as needed then scroll up and click Publish.
The Publish button is in the right column about halfway down. If you return to edit this story, this button will have changed to the Update button. After making any changes to the story or its settings you will need to have click the Update button for them to appear.
Slideshows:
| Slideshows are built by uploading multiple photos to a story. Follow the steps below to make a slideshow that goes with any story. | ||
| When adding/editing a story, click on the Add Media button above the main story box. In the window that opens, click on Upload Files and upload from your computer all of the images you are interested in adding to the slideshow. (DO NOT click Create Gallery.) | ||
| Click on each image you uploaded and use the boxes that appear to the right to enter a caption and photographer. To see just the images that will be in your slideshow, choose “Images uploaded to post” from the dropdown menu. | ||
| When you are done adding the pictures, click the X in the upper right-hand corner. (DO NOT click Insert into post). You will not see these photos anywhere on the Edit Story page for the story, but once you view your story on your website, they will be displayed there. | ||
| For each image, use the boxes that appear to the right to enter a caption and photographer. Then click the X in the upper right-hand corner. (DO NOT click Insert into post). | ||
| Select “Slideshow of all Attached Images” for the Featured Image Location option, and a slideshow with captions and photo credits will automatically be generated at the top of the story. | ||
| You will not see these photos anywhere on the Edit Story page for the story, but once you view your story on your website, they will be displayed there. | ||
| It is recommended that you also add a Featured Image to this story so that an image will be displayed on the homepage of your site. |